| 3D Basics. | Basic Exercises. |
Working with Basic 3D Graphics.
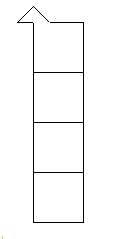
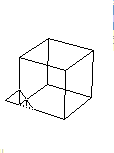
perspectiveTry this piece of code: cs st repeat 4[repeat 4[fd 50 rt 90] fd 50 down 90] It should draw 4 squares each on top of the last. Now type: perspective Then try the code again. To get back to the normal Logo view type: window |
| ||
Basic 3D commandsYou should be used to the basic 2D Logo commands: fd bk lt rt.
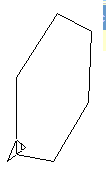
window The result is a flat hexagon in the plane of the screen. Now try:
perspective The result is a flat hexagon viewed from a point up and right of the origin. |
| ||
Up and DownThese commands tip the turtle upwards or downwards by an angle taken to be in degrees.
perspective The result is a flat hexagon which looks 'horizontal'. Now try:
perspective The result is a flat hexagon tilted towards the viewer. |
| ||
rightroll and leftrollThese commands roll the turtle rightwards or leftwards by an angle taken to be in degrees. The turtle is still 'flying' in the same direction but the plane that it will draw in has been tilted.
perspective The result is a flat hexagon which has been rotated around the 'vertical axis'. Now try:
perspective The result is a flat hexagon rotated towards the viewer. |
| ||
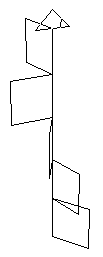
Visualising up/downThis code will draw a sequence of 'flying squares.' Try to understand exactly what is happening and then modify the code. Try to predict what should happen. cs repeat 4[repeat 4 [fd 80 rt 90] fd 80 down 30] You start with a 'vertical' square which gradually flattens out onto a 'horizontal' plane. Now try: cs repeat 5[repeat 4 [fd 80 rt 90] fd 80 up repcount*20] The result is a sequence of squares which 'loop the loop.' |
| ||
Visualising leftroll/rightrollThis code will draw a sequence of 'flying squares.' Try to understand exactly what is happening and then modify the code. Try to predict what should happen. cs repeat 4[repeat 4 [fd 40 rt 90] fd 40 rightroll 30] You start with a 'vertical' square which gradually rolls rightwards. Now try: cs repeat 5[repeat 4 [fd 40 rt 90] fd 40 leftroll repcount*20] The result is a sequence of squares which roll increasingly leftwards. |
|
Basic Exercises.
These are a sequence of tasks which draw interesting objects using the commands discussed above.
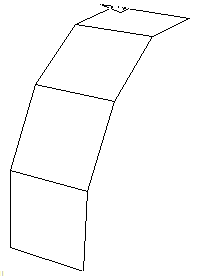
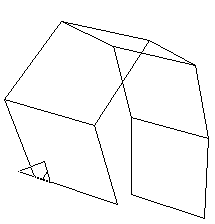
PrismsTo draw a prism you must first be able to draw a rectangle. cs repeat 2 [fd 200 rt 90 fd 50 rt 90] This draws a rectangle Now try: perspective cs repeat 5 [repeat 2 [fd 50 rt 90 fd 200 rt 90] fd 50 up 72] The result is a sequence of rectangles which fold up into a pentagonal prism. |
  |
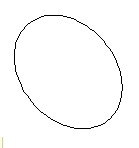
CylindersTo draw a cylinder you must first be able to draw a circle. cs ht repeat 90 [fd 4 rt 4] This draws a circle which is viewed in perspective mode. Now try: cs ht repeat 10 [repeat 90 [fd 4 rt 4] down 90 fd 20 up 90] The result is a sequence of circles which are moved further away from the viewer on each iteration. |
  |
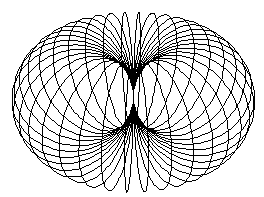
DoughnutsInstead of pushing the circle away from the viewer you can rotate it instead. cs ht repeat 100 [repeat 90 [fd 4 rt 4] rightroll 10] |
 |
|
To give the dougnut a wider hole you need to use a procedure.
to otorus :rthroat :segsize Run the code with the command: otorus 50 4 Too open the doughnut up you first lift the pen and restore the turtle to the home position. |
 |
SnailsHere is the code for a snail.
to snail :rthroat :segsize :coils Run the code with the command: snail 20 8 80 |
 |
HelixHere is the code for a helix. cs ht repeat 500 [fd 5 rt 5 rightroll 1] I've used the menus on the main window to alter the pensize and colour. |
 |
Expanding HelixHere is the code for a helix that expands. cs ht up 90 repeat 1000 [fd repcount/50 rt 20 rightroll 2] | |
 | |
Last updated 23rd February 2010
